After finding some spare time, I would like to make a small guide to make a small list of commands I know till now which you can use for a better gameplay or simply, make it a little bit customised. For the sake of a better guide, I decided to split them into 3 categories. These are Beginner, Intermediate and Advanced. The Beginner section includes, in my humble opinion, the commands you can most frequently use whereas the Advanced section is reserved for the commands that you may rarely need or rather for experienced modders.
Before starting, I would like to give a huge thanks and credits to Wombat Trucker who helped me 2 years ago and thousands of players out there to get into flying, teleportation and the console itself.
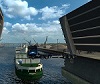
Important note: Although all the instructions given in this video are still valid, due to the Open Player feature brought in 1.41, it is required to use CTRL+F9 to land the truck as only F9 itself opens the convoy chat.
Beginner
- goto : This command works in 3 ways.
The first method is with the localized city name. To roughly explain, it is is a single-word internal name of a city. Let's take a popular destination, Kirkenes, as an example for the first method:
andCode: Select all
goto kirkenesThe second method is by the city name itself without any special characters. For this method, let's take somewhere from the Finnmark region as an example, Tana Bru:Code: Select all
goto Kirkenes
andCode: Select all
goto tanabruAs you can see, tanabru is the localized city name which is no big secret since ProMods definition files are open to everyone (and I am personally glad they areCode: Select all
goto tana bru ). On the other hand, tana bru is the displayed name. Now, do you think that the second one will work? The answer to this question is a big fat NO! Because due to the space between Tana and Bru, the game will interpret it as if you want to go to Tana and if the city exists, the game will teleport you to Tana. Otherwise, the console will give an error. So, in this case, the right format should be:
Code: Select all
goto "Tana Bru"
- The third way is by coordinates. As many of you know, when you press F11, your bug report will be saved in bugs.txt with your note; date and time; map sector and; coordinates as you can see in the image below which is a very very random report.

all you have to do is to copy the highlighted area and type,
This will teleport you to the exact point with the same exact camera angle.Code: Select all
goto 80874;-3.67767;69485.1;-1.85065;-0.122753
- g_traffic : The command that enables you to modify the traffic density. It takes values between 0 and 10 and keep in mind that the base value is 1. Please consider this value as a spawn ratio which does not have to be an integer. If you set it to 2, the traffic will be doubled. If you set it to 3, it will be tripled and so on and so forth. On the other hand, if you set it to 0.7, for instance, the spawn ratio will be reduced to 70% whereas if you set it to 1.5, it will be increased to 150%.
- g_set_weather : The command that enables you to change the weather. It takes an integer value and simply, if you enter an even value, the weather gets sunny. On the other hand, if you type an odd value, the weather gets rainy.
- g_set_skybox : As the name indicates, the command that enables you to change the skybox. Thanks to the feature coming to the camera mode with version 1.41, we know that both games have 7 different skyboxes for the sunny weather and 4 different skyboxes for the rainy weather. Therefore, this command takes integer values between 1-7 when the weather is sunny whereas it takes integer values between 1-4 when it is rainy unless you use a graphics mod which adds more than 7 skyboxes.
- g_set_time : The command that enables you to move forward the time. Please note that there is absolutely no way to go back in time in the game. Given that a day consists of 24 hours, it takes values between 0 and 24. Now, in order to explain what I said in the beginning, assume that we are on Wednesday in the game and it is 14:23. If you type:
this will not take you to Wednesday, 14:00 (2 P.M.). Instead, this will take you to Thursday, 14:00 (2 P.M.). There is also another way to use this command but I prefered not to mention it. Because it is longer and less useful than this method.Code: Select all
g_set_time 14
Intermediate
For the first three commands that I will provide in this section, I owe many thanks to Squirrel for literally saving me from the truck physics mods and letting me to customise my entire physics settings.
- g_truck_stability : As you can understand from the name, it is the command that enables you to decide how much you want your truck to be sensitive to steering. I.e. - how much you want it to shake. The base value is 0.5 and keep in mind that the more you go under this value, the more the truck will shake whereas the more you go over this value, the more the truck will be stable in response to steering.
- g_trailer_stability : The trailer version of the command above.
- g_suspension_stiffness : Compared to the 2 commands above, this command is relatively need more attention as it is the main one that affects the physics and your driving experience. Plus, a bit more sensitive. Keep in mind that unlike the other 2, the base value in here is 1 and as you can understand from the word suspension, you decide how you want your truck to react to any encounter with bumpers, crashes, manoeuvres and so on and so forth.
- warp : The command that enables you to modify the game "velocity". Also, the one which underlies almost every single mod showcase on YouTube. I.e. - the command that enables you to put the game in slow-motion or in time-lapse. Keep in mind that the base value is "1" and the value does not have to be an integer. E.g. - if you set it to 0.8, the game will be slowed down by 20% whereas if you set it to 1.2, the game will be speeded up by 20%.
- g_remove_missing accessories : I must admit that this one is a bit tricky to explain. Assume that you activated a tuning/accessories mod and modified one or more trucks with the accessories provided by this mod. But in the end, you decided to deactivate the mod for some reason without selling all of them first. And because of that, your game crashed. To overcome this problem,
-> you can load your profile first.
-> type-> reload the save gameCode: Select all
g_remove_missing_accessories 1
-> typeCode: Select all
g_remove_missing_accessories 0
- g_cam_window_block : The command that enables you to block the driver window. I.e. - when you move your head in camera 1 to the left (or to the right in case of RHD), the camera will stick out and act in a similar way to camera 5 no matter if the window is shut or not. Now, if you type
on console, you won't be able to stick your head out through the window while it is shut anymore. Therefore, to check the rear, you will have to open the window just like in real life. As you may have noticed, you can change it back to 0. Thanks to SiSL for teaching that command in his Ford FMAX showcase video.Code: Select all
g_cam_window_block 1
- g_show_game_blockers : The command that enables you to hide all the barriers from XXXX barriers to arrow pointing barriers. The base value is 1 and in order to hide them, you have to change the value to 0.
- g_show_game_elements : The command that enables you to hide all types of floating icons you can imagine from weight station icons to white floating delivery icons. Like the command above, type 0 to hide and type 1 to reveal them.
Advanced
- g_minicon : As a matter of fact, this one is not that "advanced". When you type
on console, a small horizontal area will pop up above the screen. However, I decided to put this in the advanced section because it provides essential data for mainly, modders such as the fps count, the triangle count (TC), the draw call (DC) and the last 5 lines from the console. In addition, if you typeCode: Select all
g_minicon 1
on console, you will obtain data in more detail.Code: Select all
g_minicon 2
g_minicon 1 :

g_minicon 2 :

- g_colbox : The command that enables you to see the vectors in game. Honestly, I am not that much of an expert with this command. However, from a mapping point of view, you can consider most of the green vectors you will see as some sort of a skeleton of a structure. I personally use this to confirm the presence of an invisible wall. And here is how an invisible wall may look like when this command is set to 1:

Source: https://promods.net/viewtopic.php?t=40808
- g_delete_uid : The command that enables you to get rid of the problematic UID in the map editor. When an UID is invalid, the map editor will pop up a separate window which shows the problemaic UID(s) as you can see in the image below.

To overcome this problem; you right click on the concerning UID and select Copy UID. Then, close the window, open console, type g_delete_uid and paste the copied UID from the warning window. Hit Enter and that UID will be gone.
Hints
- You do not have to know all the long commands by heart. When you click on TAB, the list of all the commands corresponding to your research will show up. The TAB key is literally the CTRL+F of console and my saviour for always forgetting g_cam_window_block


- When you type a command that takes a numerical value alone and press ENTER, an info line indicating the current setting and the default value will show up.

- By the up and down buttons of your keyboard, you can consult the previous commands you typed on console so that you do not have to retype them. Even if they are from the previous session...
That's all folks! Thank you very much for reading and if you wish to correct an information or add another command, please feel free to give me a feedback.